How Do You Edit Sound on a Video
Have you ever watched a video where the music was so loud you couldn't hear the voice over? What about the other way around? "Mixing" as it's referred to in video production, is the art of blending your audio tracks to deliver a seamless audio experience, which can be achieved when you edit video.
In fact, big time Hollywood productions have teams dedicated to all different facets of sound. Many people take sound production for granted as it's not as noticeable as moving images on a screen. Yet, sound carries you through the video experience. It allows you to experience the moving images in a different way, and associate a feeling with those images.
Before starting your mix, you need to start by recording good audio! We've put together a top to bottom audio best practices that will help you capture high quality audio before you start to edit.
How To Get The Right Sound
Get Your Tracks In Line
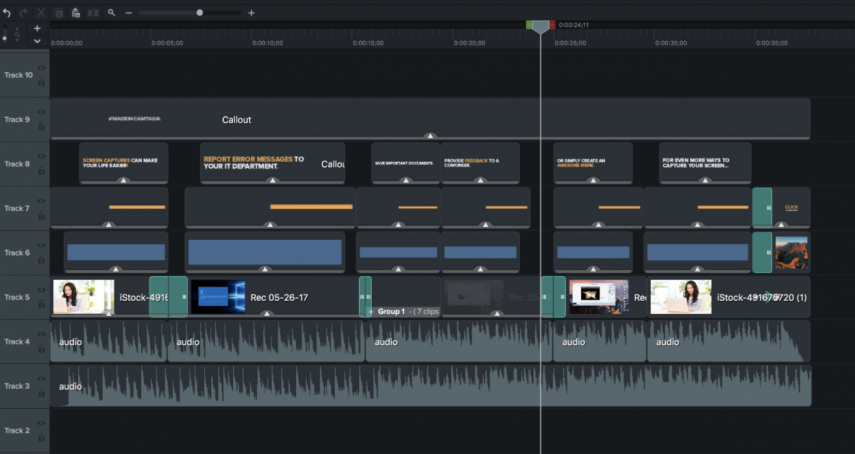
When you begin any edit, it's important to start by organizing your timeline. Editing your video is an art, make no mistake about it. Make sure to have your tracks separated by type (audio, video, animations, titles etc.). Then make sure your timeline is consistent. A disorganized timeline is the fastest way to wasting time while editing.
Selecting The Right Music
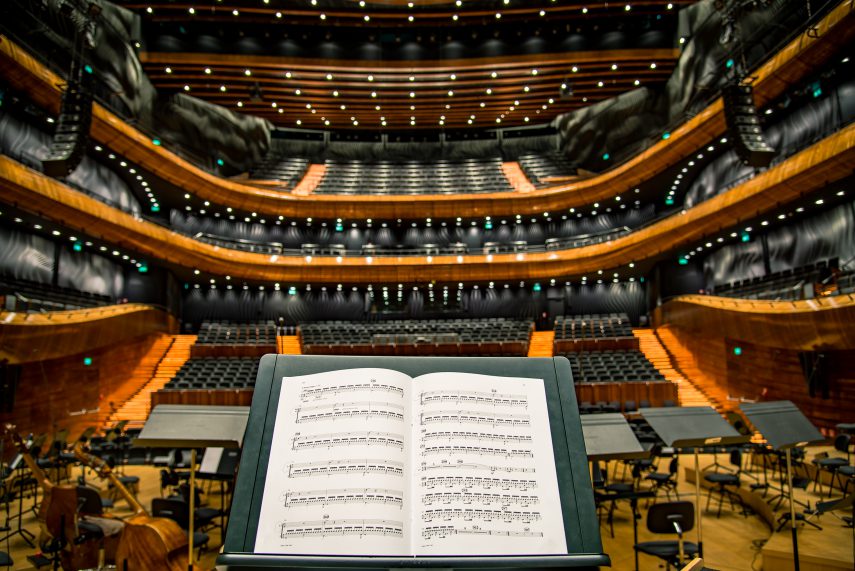
Selecting the right music is often the toughest part of editing a video. If your music choice significantly over-powers your narration or voice over, you may need to select a different track. Some people have soft voices that will not do well with overbearing musical scores. Additionally, you will want to make sure that the music you select fits the pacing of your video. There are many posts about choosing the right music for your video, our best advice is to pick a track that matches the feeling you're trying to convey. By simply asking yourself what the mood of the video is, you will be able to further define your selection.
Quick tip: There are many royalty free music website that provide professional musical scores. As with any production, you'll want to make sure you have the rights to music before publishing. Services like YouTube and Facebook will block your content if it has an active copyright. Here are some royalty free music sites you can look into:
- Premiumbeat.com
- Musicbed.com
- Audiojungle.net
Balancing Volume

Once you get your tracks in order and a rough edit, it's time to start mixing. You may think that you should have all of your track volumes at the same level. WRONG. You need to keep your audio tracks balanced and flowing; just like your footage. This means that some audio tracks may need to be lower than others. This is especially true with voice over talent that have soft voices. In most video editing software the audio track will have a horizontal line that can be clicked on and adjusted. This line adjusts the volume of the track up or down. Below you'll see how we create the illusion of fading audio in and out. One good trick is to close your eyes and listen. If the voices sound like they are drowning under the music, you'll need to adjust the individual clip.
Quick tip:Music should always slightly fade lower as narration or voice over begins. That means that if your music is loud, bring it down a few notches when the clip with voice over begins. It shouldn't fade out entirely however, as this will also be jarring to your viewer.
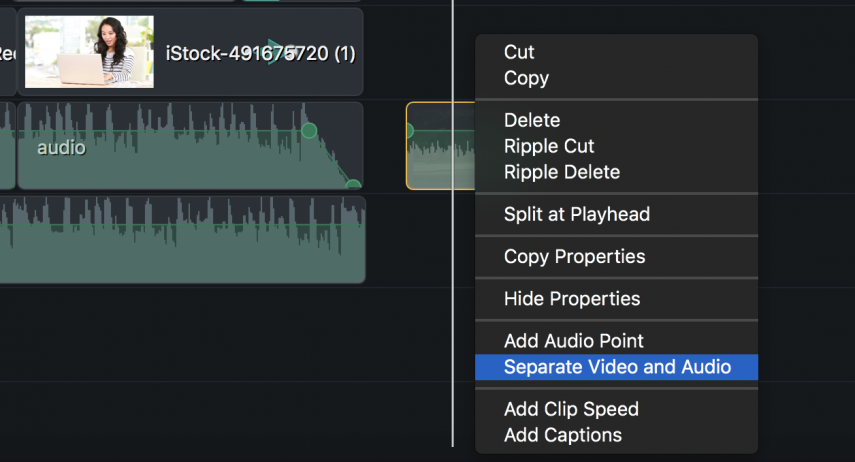
To better help keep your audio tracks balanced, you can separate audio and video so that your audio edits do not affect your video edits. In Camtasia, you can do this by right clicking on any video clip and selecting "Separate Audio and Video". This will allow you to adjust track volume and apply fade ins, gains and more.
Key Framing or Adjustment Points
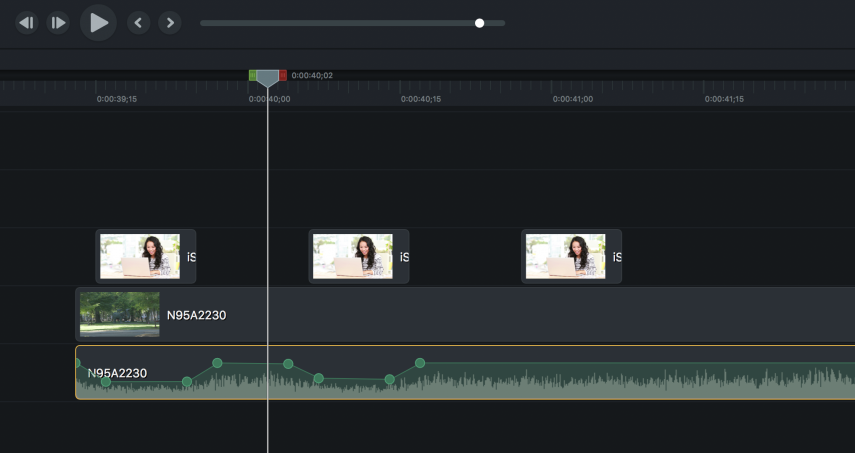
As we mentioned above, you'll need to adjust audio volume when voice over or narration begins. In Camtasia, you can apply fade in and fade out effects. This allows you to effectively apply key frames where you want your track or music audio to be higher or lower. A key frame is a location on a timeline that marks the beginning and end of a transition. In this case, we're using it for an audio transition, but they can be used with video, animations and more. This is where music or voice over should fade in and out. Keyframing helps us create the experience for the viewer. Zoom into your timeline, find the audio track and mark your keyframe for where you want the volume to fade lower, and again for where you want it to get louder. Adjusting your audio in this way, will help your characters, narrators and voice overs be heard while still having the music lead them through the video.
Quick tip: Use Camtasia's drag and drop audio effects to apply fades. Then select the circular nodes on your audio track to adjust the levels.
Normalizing Audio Is Important
Audio is just one important part of editing video. Often, it's an overlooked component for beginner video creators. You could create a picture perfect video, but poorly mixed audio will distract your viewers' attention. Remember the quick tips above and you will be on your way to creating a powerful and engaging video! You can also try these tips using Camtasia, which includes a 30 day free trial.
If you are interested in learning more about video editing, check out our other blog posts about video editing tips and tricks.
- How to Trim Videos
- How to Rotate Videos
- How to Crop Video
- How to Make Video: Before Starting Your First Video, Part 1 and Part 2
- B-roll: The Secret Sauce of Any Great Video
- Testing Different Microphones
What are your thoughts about editing video? Let us know on Twitter or Facebook.
How Do You Edit Sound on a Video
Source: https://www.techsmith.com/blog/edit-video-normalize-audio-clips-volume/
0 Response to "How Do You Edit Sound on a Video"
Post a Comment